
How to Braid Horse Hair
Depending on your equestrian experience and the level you ride at, you might have never thought about having to braid your horse’s hair. Usually reserved for competition, braiding can be a tricky skill to master. This guide will break it down, step by step, to help you create show-worthy plaits on even the most unruly manes.
Table of contents
How many plaits should a horse have?
History of horse braiding
Horse braiding has been around for hundreds of years, with records dating back to Ancient Greece. It’s believed that the practice originated in Asia, where a braided horse tail was seen as a status symbol.
Horse braiding started as a practical solution. Horses were once the main mode of transportation, so braiding their manes and tails was the best way to keep their hair from getting tangled. This was also adopted by farmers and labourers who used horses. Braiding prevented the hair from being caught in equipment and getting damaged.
It wasn’t until the early 1800s, when European cavalry officers began braiding their horses, that the appearance of the braids overtook the practicality. The officers thought the braids streamlined their horses’ appearance and gave them an elegant look.
Throughout history, many theories and tales have popped up about the origin of horse braiding. In ancient folklore, fairies were believed to visit horses in the middle of the night and tie knots in their manes, known as ‘elf knots’!
Today, horse braiding is practised around the world. You often see it in dressage, show jumping, and western riding disciplines.

How to braid horse hair
Whether it’s competition day or you’re just practising, attention to detail makes all the difference when braiding a horse’s hair. Creating a neat braid presents a polished look and shows that you have taken the time and care to invest in your horse’s presentation.
Tools
To get picture-perfect braids, you will need:
- Mane and tail combs
- Scissors
- Spray bottle with water or detangler
- Towel or cloth
- Fine comb
- Braiding thread or bands
Before you begin, groom your horse to remove dirt and tangles. Ensuring your horse is clean and dry makes a great base for braiding.
Step 1: Prepare materials
Lay out your braiding tools to make the process as easy as possible. Any flat surface will work; just ensure easy access to everything you need.
Step 2: Divide the mane
Using the fine comb, divide the mane into even sections. The number of sections will depend on how thick your horse’s mane is, though typically, having an uneven number of braids is suggested.
Step 3: Wet the mane
Mist the mane lightly with water or detangler to make it easier to work with. This helps reduce tugging and breakage while braiding.
Step 4: Begin braiding
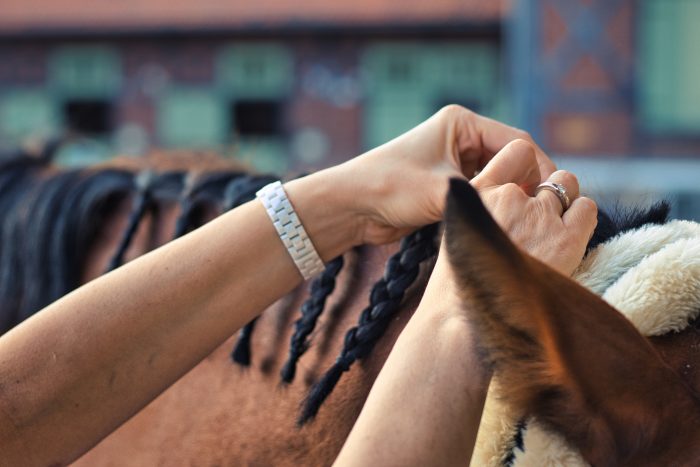
Begin with a small section at the base of the mane. Divide it into three even strands. Cross the right strand over the centre strand, then the left strand over the new centre strand. Repeat this until you reach the bottom of the section, then use braiding thread or a band to secure the braid in place. Make sure it’s tight but not so tight that it causes discomfort.
Repeat this process on all sections.
If you’re just practising, you might want to leave it here. However, if you’re preparing for a competition, the braids alone may distract from your performance. While no rule says you have to braid your horse in these competitions, most riders choose to for a neat look. Continue reading to learn how to braid a horse’s mane for dressage, show jumping, and other competitions.
Step 5: “Roll” the plaits
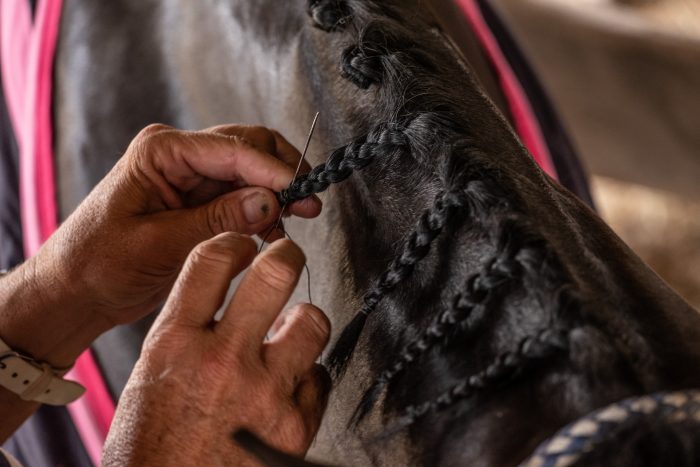
Use a needle and braiding thread to fold the end of the braid underneath and sew it into place. Then, pass the needle underneath and through the top of the plait from the underside to fold it in half. Repeat this to create a small ball. If your horse’s mane is especially long, you might need to do this a third time.
Step 6: Sew into place
To secure the ball, pass the needle and thread through the plait repeatedly until it feels secure but not so tight that it irritates your horse. Once you’re happy, run the thread through once more before trimming the excess.
Step 7: Plait the tail (optional)
If you’d like to plait your horse’s tail, follow the first three steps, ensuring the tail is clean and brushed. Take a small section from the base of the tail and split it into three. Begin plaiting, but every time you cross the centre section, take a piece from either side of the tail and add it in. It should look like the tail is in a tube with a plaited seam. Continue until you are about halfway down the tail, then stop taking sections and plait, leaving the rest of the tail loose.

Step 8: Finishing touches
Finally, use the scissors to trim any stray hairs. You could use hairspray or a wax to keep the style in place and minimise flyaway hairs.
Before the competition, check that all braids are neat and make any last-minute adjustments.
How many plaits should a horse have?
As mentioned in step 2, having an uneven number of plaits in the mane is typically recommended. This traditional practice is considered more aesthetically pleasing as the mane appears more balanced. 9, 11, or 13 plaits are most frequently seen.
Can horse braids be left in?
Leaving braids in for a day or two is generally safe, but we wouldn’t recommend leaving them any longer. Leaving braids in too long can cause hair breakage, making the mane thin. It can also irritate your horse as braids limit their ability to swat away flies, especially in warmer months, leading to itching. Braids can be redone daily if you’re competing for multiple days simultaneously.
Our collection of horse plaiting products has everything you need to create show-worthy braids. Shop everything from plaiting thread and bands to combs and holding wax. Our plaiting collection features products from leading manufacturers like Shires, Supreme Products, and Bitz. Explore further in our wider collection of grooming products.
Read next
Your complete guide to dressage dressing
When competing in dressage, there are several rules and requirements to stick to. Both you and your horse need to adhere to these rules otherwise, you may risk losing points or even disqualification!
How to wash & store saddle pads
A clean and properly stored saddle pad will serve you well for many years. Keeping them in good condition is important for their longevity and your horse’s comfort, leading to better performance and a bond between horse and rider.
How to wash horse rugs
Keeping horse rugs clean is challenging, especially ones designed for outdoor use! While your rugs will never stay squeaky clean for long, and a bit of dirt is to be expected, there comes a point where rugs will need some TLC.

Comments are closed here.